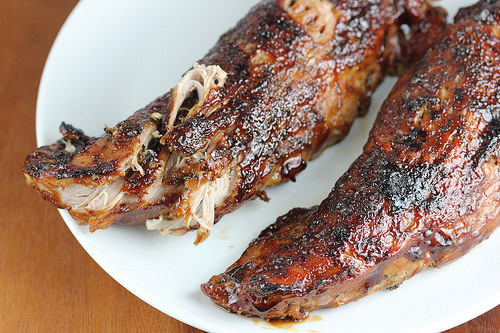
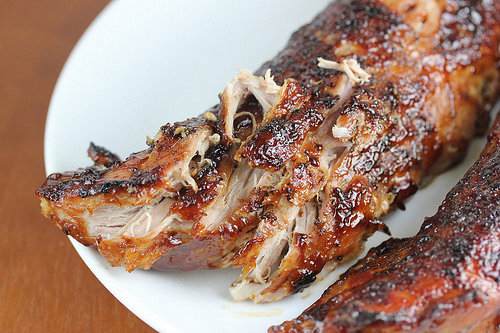
There’s something special about making this slow cooker pork tenderloin because it turns out tender every single time without extra work. You start with a quick spice rub, let the slow cooker do the heavy lifting, and then finish it with a balsamic glaze that adds just the right balance of sweet and tangy. The best part is how the flavors soak into the meat while it cooks, so every slice is packed with taste. It’s one of those recipes you’ll come back to often because it feels easy but still has that wow factor at the table..
Why this recipe works
- Seasoned rub: A mix of sage, garlic, salt, and pepper gives the tenderloin an herby base flavor that cooks deep into the meat.
- Slow cooking: Using the slow cooker keeps the pork juicy and tender, while also making it easy to prepare ahead of time.
- Balsamic glaze: Brown sugar and balsamic vinegar combine to make a sweet and tangy glaze that balances the savory meat.
- Optional crust: Broiling at the end adds a caramelized finish that gives the pork a slightly crisp outside while staying tender inside.
- Simple steps: With minimal prep and common ingredients, this recipe fits easily into busy days without sacrificing taste.


Serving suggestions
- Family dinner: Slice the pork and serve with wild rice and steamed vegetables for a complete, filling meal.
- Special touch: Add roasted potatoes and a side salad for a dinner that feels a little more festive without extra work.
- Weeknight option: Pair with buttered noodles or mashed potatoes for a simple, comforting plate that kids and adults will enjoy.
- Leftover use: Use the pork slices in sandwiches or wraps the next day with a bit of glaze for extra flavor.
- Balanced plate: Serve with sautéed green beans or asparagus for a lighter, vegetable-forward side to balance the richness of the pork.

Slow cooker pork tenderloin recipe
- Total Time: 6 hours
- Yield: 6 Servings 1x
Description
Try this slow cooker pork tenderloin recipe for a delicious, juicy dinner made with a sweet balsamic glaze. Perfect for busy weeknights.
Ingredients
Units
Scale
- 2lbs pork tenderloin
- 1 teaspoon ground sage
- 1/2 teaspoon salt
- 1/4 teaspoon ground black pepper
- 1 garlic clove (crushed)
- 1/2 cup of water
- 1/2 cup brown sugar
- 1 tablespoon cornstarch
- 1/4 cup balsamic vinegar
- 1/2 cup of water
- 2 tablespoons soy sauce
Instructions
- In a small bowl combine sage, salt, pepper, and garlic. Mix well. Rub the mixture over the tenderloin.
- Add a ½ cup of water to the slow cooker. Place the tenderloin into the slow cooker. Cook on low for 6 to 8 hours.
- An hour before the tenderloin has finished cooking. In a small saucepan combine brown sugar, cornstarch, balsamic vinegar, ½ cup water, and soy sauce. Heat over medium heat while stirring until the mixture becomes thick.
- Brush the tenderloin in the slow cooker 2 to 3 times during the last hour of cooking.
- Optional step: To get a caramelized crust, remove the tenderloin from the crockpot and place onto a baking sheet lined with aluminum foil. Brush the tenderloin with the glaze and set under the broiler for 1-2 minutes or until bubbly and caramelized. Repeat 2 to 3 more times until the desired crust is achieved.
Nutrition
- Serving Size:
- Calories: 248
- Sugar: 18 g
- Sodium: 427.3 mg
- Fat: 3.3 g
- Carbohydrates: 20.4 g
- Protein: 32.2 g
- Cholesterol: 98.2 mg