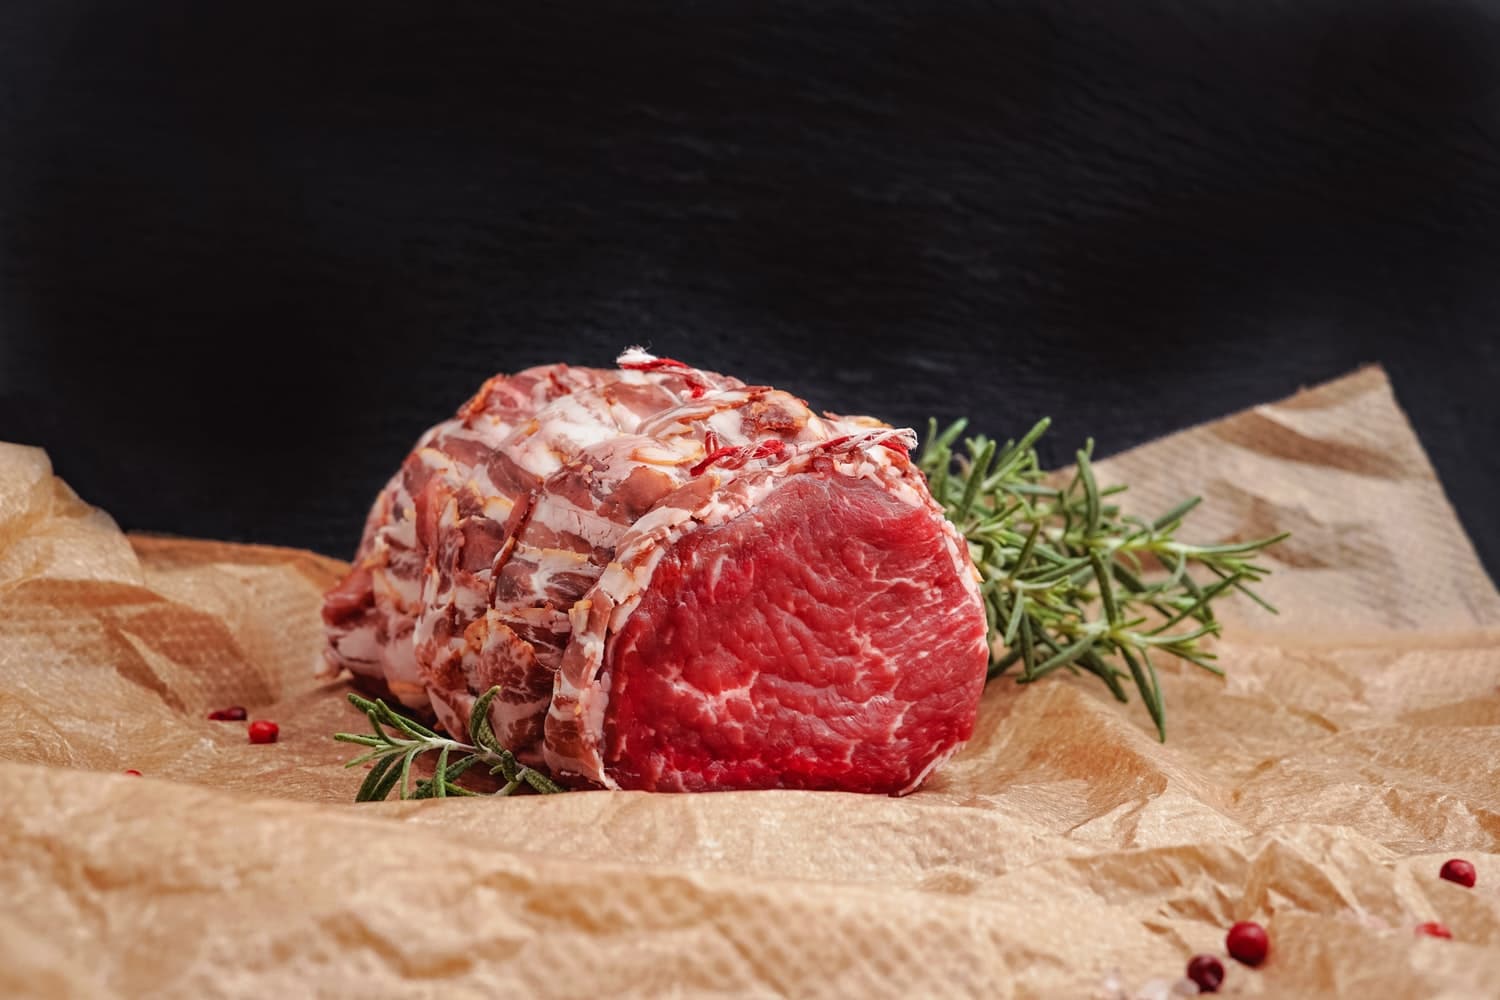
I used to think Pork Butt referred to the butt of a pig. I laughed a lot when I found out that Pork butt, despite its name, is a cut from the pig’s shoulder’s upper part. The Pork butt is on the upper end of the foreleg, whereas the Boston butt is on the lower end of the foreleg. Both cuts are tough pieces of meat with a lot of connective tissue, but they also have a lot of marbling and flavors.
When cooked slow and low, pork butt becomes so tender and succulent that it can be easily shredded with a fork. Although we use a boneless cut, you have the option of using a bone-in butt. The amount of fat on the cut is most important because it provides moisture and flavor.
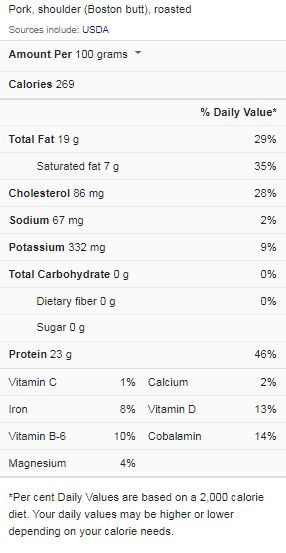
Pork Butt Nutrition Facts

Valuable tips when cooking pork butt
I’ve learned a few tricks about pork butt (giggle…I said butt) over the years, and I’d like to share them with you. So here are some vital points to note if you want your pork butt to come out great:
Pork butt isn’t literally the butt
Pork butt is not, in fact, pork butt. It’s more akin to a pork shoulder. However, it can be perplexing because either or both of those terms may appear on the label at the store. In this recipe, either will suffice. However, the pork “butt” is located higher on the pig’s back, while the “shoulder” is located slightly lower.
Smaller pork butts are the best
Size does matter. However, how important a matter is depends on your personal preferences. I prefer roasting two average-sized 3 or 4-pound pork butts beside one another in the same roasting pan instead of a single 8-pound pork butt because they stay moister longer.
The meatier the pork butt, the better
Many people prefer bone-in pork butt to boneless pork butt for the best flavor. Others prefer the ease of using boneless pork butt. Whichever option you choose, make it work for you. Pork has been bred to become increasingly leaner over the years, which is not a good thing. My recommendation is to get a nice heritage pork butt that is well-marbled and has an obscenely thick layer of fat on it. Because the fat slowly melts as the pork roasts, constantly bathing the underlying meat in what I like to think of as essential fatty acids of a different, porkier, yet still healthful variety. You will not be sorry.
Print
Slow cook pork in oven
Description
When slow-cooking boneless or bone-in pork shoulder in the oven, you have a lot of flexibility, which is great for entertaining. In fact, at this low temperature, the cooking time could be extended by an hour or two, and the roast would be no worse for wear. So you can just throw it on the table whenever everyone is ready to eat.
Ingredients
- One (6½ – 8 pounds) boneless pork butt
- 1 tablespoon of brown sugar
- 1 teaspoon of ground cumin
- 1 tablespoon of brown sugar
- 1 tablespoon of paprika
- 3 rinsed anchovies
- 2 tablespoons of chopped garlic
- 1 tablespoon of coarsely ground black pepper
- 1/4 cup of olive oil
- 2 tablespoons of dried leaf thyme
- 1/2 tablespoon of onion powder
- Barbecue sauce (optional)
Equipment
- Food processor
- Sharp knife
- Read meat thermometer
Instructions
- Combine the anchovies, salt, garlic, rosemary, and pepper in a small food processor. As you process the olive oil, scrape down the sides until it forms a paste. Remove the blade and stir in the mustard with a fork or spoon. Distribute the paste evenly over the pork shoulder. Place it in the refrigerator for 2 – 24 hours, loosely wrapped in plastic wrap to allow the flavors to infuse the meat.
- As the pork comes to room temperature, preheat the oven to 450° F.In a shallow roasting pan, roast for 30 minutes, uncovered, until the top begins to brown.
- Reduce the heat to 250°F and continue to cook for 6 to 8 hours, uncovered. or until the middle of the roast registers 180°F on an internal thermometer. The meat is very tender all the way through as you slide the thermometer into the core.
- If any juices are in the pan, pour them into a heatproof container, such as a Pyrex measuring cup. Next, place it in the fridge to allow the fat to rise to the surface while the meat rests.
- If you think the outside of the roast could use a little more crust/brownness, cook for another 15 to 20 minutes at 450°F to give the outside a more crunchy texture. Allow cooling for about 20 minutes after removing from the oven. Pour the cooking juices into a bowl after removing the fat from the reserved juices in the fridge.
- Mince the pork as thinly or thickly as you like, knowing that it will at least slightly fall apart. Before serving, season the sliced meat with salt and place the pan juices on the side for drizzling.
