The first time I made cheese tarts from scratch, I didn’t expect them to disappear so fast. I set the tray on the counter to cool “just for a minute,” and when I turned around, two were already gone. One of my guests had burned a tongue and didn’t even care. That’s when I knew this recipe was special.
Cheese tarts have a quiet magic to them. They’re not flashy like layer cakes or dramatic like soufflés. They win people over with balance — crisp buttery crust, silky tangy filling, and that gentle sweetness that keeps you reaching for another. If you’ve ever stood in a bakery staring at golden tarts behind glass, wondering if you could make them at home, this guide is for you.
Read next: How to make lavender punch 4 ways
I’ve made these countless times in my own kitchen, tweaking, testing, and occasionally eating the evidence straight from the pan. Ready to experience that in your kitchen? Read on to learn how.
Why cheese tarts are special
Cheese balance comfort and elegance beautifully. They feel fancy enough for guests but familiar enough to bake on a quiet Sunday afternoon.
What sets a great cheese tart apart is contrast:
- A crust that snaps lightly when you bite into it
- A filling that’s smooth, creamy, and tangy
- A subtle sweetness that never overwhelms
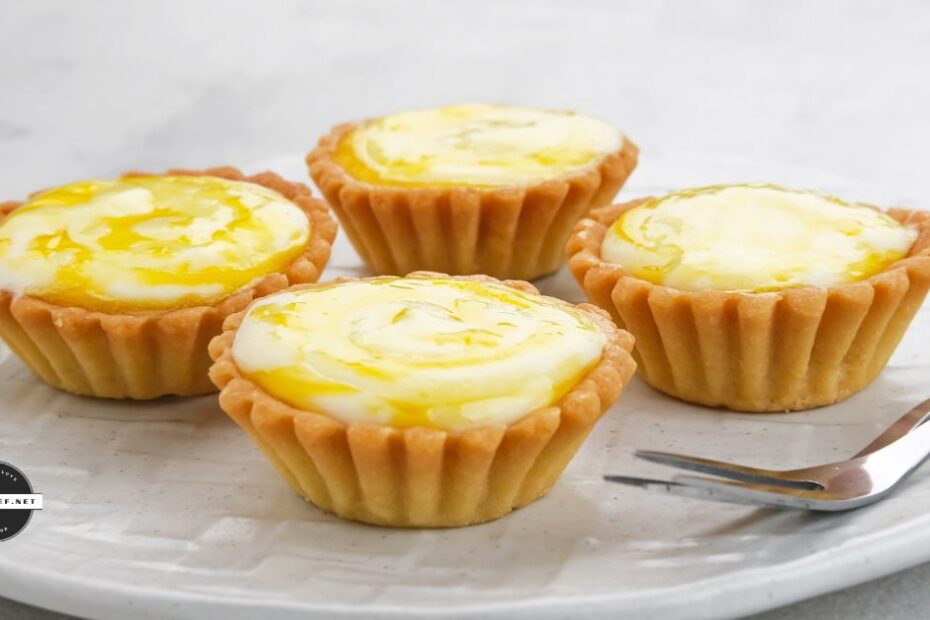
Cheese tarts are lighter than cheesecake with more structure than custards. A cheese tart done right taste like something you’d find in a small European bakery, especially when they’re made from scratch.
That’s why I always lean toward handmade cheese tarts instead of shortcuts. You can taste the difference.
Ingredients
You don’t need anything exotic to make a memorable cheese tart. That’s the beauty of this dish: simple ingredients coming together to create something better than its parts.
For the tart crust
- All-purpose flour for just enough structure
- Cold, unsalted butter for flavor and flakiness
- Powered sugar so the crust remains tender and delicate
- Egg yolk to bind the dough and add richness
- A pinch of salt for balance
This crust is closer to a sweet shortcrust than pie dough. It’s forgiving and easy to handle, even for beginners.
For the cheese filling
- Full-fat cream cheese
- Heavy cream for a silky, bakery-style texture
- Granulated sugar for light sweetness
- Egg to set the filling
- Vanilla extract for flavor
- Lemon juice or zest for a nice zing
Every ingredient has a job. Skip the low-fat substitutions here. The texture simply won’t be the same.
Step-by-step: Making cheese tarts from scratch
Here are the steps for a scratch-made cheese tart.
Read next: Cream cheese wontons recipe
Make the crust
- Mix dry ingredients. Combine flour, powdered sugar, and salt in a bowl.
- Cut in butter. Slice butter into pieces. Using your fingers, rub the cold butter into the flour mixture until it looks like breadcrumbs. Aim for small, even pieces, not paste.
- Add egg yolk. Mix the dough until it starts to bind together. If it looks dry, add a teaspoon of cold water.
- Rest. Wrap the dough in plastic wrap and place in the fridge for 30 minutes.
- Shape. Divide dough into six equal portions and form each portion into a muffin pan or tart pan, creating a thin base and sides for each tart.
- Bake. Bake the tart shells at 350°F (175°C) for about 12 to 15 minutes until lightly golden. Let them cool before filling. Baking the crust before filling it is a technique called blind baking. It creates a firmer crust. Learn more about blind baking here.
Make the filling
- Soften the cream cheese. The cheese must be room temperature to avoid lumps.
- Beat until smooth. Use a hand mixer on a low setting. You want to smooth the cheese without whipping in too much air.
- Add sugar and egg. Mix after each addition.
- Add cream, vanilla, and lemon. Mix until filling is glossy, thick, and pourable.
Assemble and bake
Pour filling into cooled tart shells, about 75% full. Then, bake them at 325°F (165°C) for 18 to 22 minutes. When done, the center should jiggle slightly. It should not be liquid or stiff. The filling will set more as it cools.
Let the tarts cool to room temperature in the pan before unmolding.
Common mistakes to avoid
I’ve made every one of these mistakes so you don’t have to.
- Overbaking the filling. If the top cracks or puffs aggressively, it’s gone too far.
- Skipping the chill time with your crust. Warm dough sinks. Always rest the crust.
- Overmixing. Overmixing adds too much air to the filling, which causes an uneven texture. If you’re worried you overmixed, tap the pan on the counter several times to try and release trapped air.
- Using cold cheese. Start with room temperature cream cheese. It blends better and bakes more evenly.
Read next: Substitute cream cheese for sour cream
Pro tips for bakery-style cheese tarts
These tips can elevate your tarts from “good” to “where did you buy these?”
- Use a metal tart pan for better heat conduction
- Bake on the middle rack only
- Rotate the pan halfway through the cook time
- Chill baked tarts for one hour before serving
- Brush tops lightly with warm apricot jam, diluted with water. This optional step provides a pretty, glossy finish.

Cheese tart
- Prep Time: 30 min
- Chill Time: 30 min
- Cook Time: 38 min
- Total Time: 1 hour, 38 min
- Yield: 6 tarts 1x
- Category: Dessert
- Method: Oven-baked
Description
A simple and delicious recipe for cheese tarts, an elegant and comforting dessert or snack.
Ingredients
- 1 cup all-purpose flour
- 1/2 cup unsalted butter, cold and sliced
- 1/4 cup powdered sugar
- 1 egg yolk
- 1/4 teaspoon salt
Cheese filling
- 8 oz cream cheese, softened
- 1/4 cup granulated sugar
- 1/4 cup heavy cream
- 1 large egg
- 1 teaspoon vanilla extract
- 1 teaspoon lemon juice
- Zest of 1/2 lemon, optional
Instructions
- Make the tart dough. In a medium bowl, combine the all-purpose flour, powdered sugar, and salt. Add the cold butter and cut it in using a pastry cutter or your fingers until the mixture looks like coarse coarse crumbs. Add the egg yolk and mix just until the dough comes together.
- Press and chill the crust. Press the dough evenly into tart molds or a muffin tin, forming a thin base and sides. Place the crusts into the refrigerator and chill for 20 to 30 minutes. This helps prevent shrinking during baking.
- Blind bake the crust. Preheat the oven to 350°F (175°C). Optionally, line each chilled crust with a small piece of parchment paper and fill with pie weights, dried beans, or rice. Bake for 12 to 15 minutes, until the edges are set. Carefully remove the parchment and weights, then return the crusts to the oven and bake for another 5 minutes, just until the bottoms look dry. Remove from the oven and let cool slightly.
- Prepare the cheese filling. In a mixing bowl, beat the cream cheese until smooth. Add the granulated sugar and mix until combined. Beat in the egg, followed by the heavy cream, vanilla extract, lemon juice, and lemon zest. Mix just until smooth and creamy, being careful not to overmix.
- Fill the tart shells. Spoon the cheese filling into the partially baked crusts, filling each about 75% full. Smooth the tops gently with the back of a spoon if needed.
- Bake the tarts. Return the tarts to the oven and bake for 15 to 18 minutes, or until the centers are just set with a slight jiggle. The filling will continue to firm up as it cools.
- Cool and serve. Remove the tarts from the oven and allow them to cool completely at room temperature. For the best texture, chill briefly before serving.
Nutrition
- Serving Size:
- Calories: 436
- Sugar: 15 g
- Sodium: 232.9 mg
- Fat: 31.9 g
- Carbohydrates: 31.8 g
- Protein: 6.3 g
- Cholesterol: 146.2 mg
Storage, serving, and variations
You can store homemade cheese tarts in an airtight container in the refrigerator for up to four days.
Bring them to room temperature before serving for best results. You can serve them plain or with fresh berries and a dusting of powdered sugar or drizzle of honey.
You can easily build on the basic tart recipe, too. Some fun variations to try are:
- Matcha cheese tarts. Add matcha powder to the filling.
- Chocolate swirl. Melt dark chocolate and swirl it into each tart.
- Lemon. Add more lemon for a brighter flavor.
Read next: New York cheesecake recipe and guide
Homemade cheese tarts: Worth it
There’s something satisfying about pulling a tray of cheese tarts from your own oven. The smell fills the kitchen. The crust flakes just right. The filling melts on your tongue.
When you make them yourself, you control the sweetness, the tang, the texture. Make these once and you may be inspired to tweak the recipe to get them just to your liking. Have fun with those experiments. And be ready to explain your process — because undoubtedly, someone will ask you where you bought your signature cheese tarts. You’ll have to smile and admit you didn’t buy them. You made them.