Instead of buying a brining bag, you can use an alternative. Several options are available, including apple juice, water, and stock. If you are unable to find the perfect brining liquid, you can substitute this by using any non-corrosive plastic bucket or food-safe plastic bag. In addition, you can use a non-corrosive container like a reusable crockpot or oven bag.
What is brining bag?
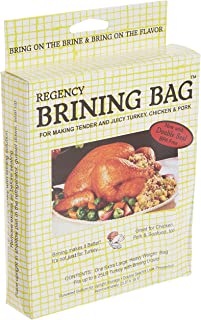
Brining bags are airtight bags used to submerge various types of meat and vegetables in a brine solution. The bags are typically clear and made of durable plastic that can easily support the weight of a huge ham or turkey. Brining bags should not be confused with roasting bags used in the oven to prepare food. A brining bag should never be used near any heat source and should only be used to brine food.
Depending on the type of brining operation that needs to be done, there are numerous different sizes of bags to employ. Some bags are suitable for brining one or two cuts of meat at a time for small cuts of meat. Brining many portions at once is doable with larger bags, such as brining four pork chops for a family lunch. There are even bags designed specifically for whole turkeys or sparerib racks.
A brining bag appears to be very similar to a freezer bag. One end is open, allowing the meat or vegetables to be inserted along the brine. The end is then sealed using a press and seal closure, ubiquitous in today’s storage bags. The brining bag locks in the flavor of the brining spices and allows them to infuse the meal once it’s been sealed.
The brining bag is a very useful item in the brining process. It is possible to brine larger portions of meat with lower amounts of brining solution. The brining bag can be spun or turned as needed to ensure that the brine evenly permeates the meat. The brine is poured out, and the brined food is removed from the bag once the food has been sufficiently brined.
It’s generally not a good idea to clean and reuse a brining bag. Instead, discard the used bag and replace it with a new one for the next brining project. This can help reduce the risk of food poisoning by reducing the possibility of any leftover germs contaminating foods later on.
It’s not difficult to find different sizes of brining bags. Many specialty food markets, as well as butcher shops, carry the bags. The smaller sizes of the bag are also available at some supermarkets, while the larger bags can be found at a restaurant supply store. While slightly more expensive than ordinary brining bags, the time spent cleaning them after the brining process is over significantly offsets the cost.
Brine bag substitute
1. Method using a brown paper bag

The turkey is placed in a grocery-store brown paper bag and cooked at a very low temperature using this approach. Brown paper bags were never meant to be used in the kitchen. The glue, ink, chemicals, and other materials used to make recyclable grocery bags could emit toxic vapors. Paper grocery bags are unsanitary and could catch fire. Intense heat may cause a bag to ignite, resulting in an open fire and the loss of the turkey.
Replace the brown bag with a turkey-sized oven-cooking bag to make it safer. When a whole turkey reaches a minimum internal temperature of 165 degrees Fahrenheit, it is done and safe as tested with a food thermometer. Check the temperature in the thickest region of the breast and the innermost part of the thigh and wing.
2. Method using a trash bag

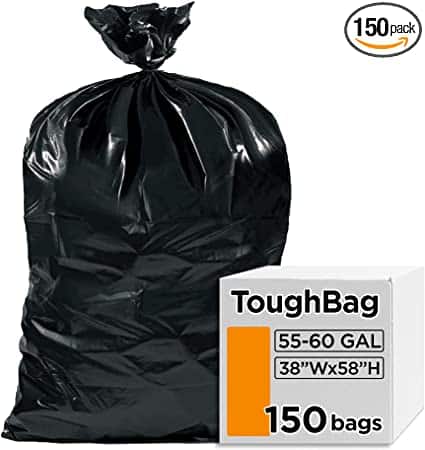
A whole turkey is marinated in salt brine, herbs, and spices for several hours in a huge garbage bag. It’s never good to utilize non-food-grade materials as food storage containers, and Non-food colors and chemicals may leak into the food. Marinating beef in the refrigerator rather than at room temperature is recommended by MSU Extension and the US Department of Agriculture Food Safety Inspection Service.
Replace the garbage bag with a large oven-cooking bag to make it safe. If you keep the turkey refrigerated while marinating, the end result will be safe and delicious.
3. In a chiller, brine

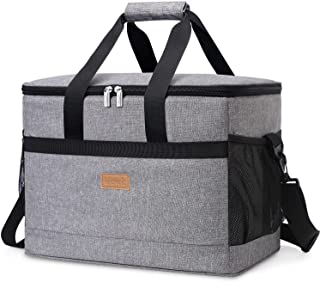
If you use a clean cooler, the turkey won’t have to go into the fridge, which is ideal if you’re short on room. The problem is that you need ice to keep the turkey cool, but you don’t want the melting ice to dilute your brine too much. Use 1/2 cup extra kosher salt in your brine to compensate for the ice melt. Before pouring the brine over the turkey in the cooler, be sure it’s cold. Depending on the cooler, you’ll need 5 to 10 pounds of ice to completely submerge the turkey in brine.
4. Brining bags in plastic

Brining in a food-grade plastic bag is sometimes more convenient and takes up less refrigerator space than brining in a big plastic container.
Brining can be done safely using regular Ziploc bags. Small chunks of meat, such as pork chops or chicken parts, can be cooked in the one-gallon size, while a full or butterflied bird can be cooked in the two-gallon size. Simply place the meat in the bag, add the brine, seal the bag, and store it in the fridge in a mixing bowl for support and collect any leaks.
Large food-grade plastic bags will suffice for items such as a whole turkey, and Ziploc Big Bags XL is one such product. These thick, strong bags are made of the same food-grade plastic as standard Ziploc bags and are designed to keep anything, including food. They’re 2′ x 1.7′ in size and can contain 10 gallons. They include built-in handles and a pleated bottom so the bag may stand on its own.
5. Overnight slow-cooking method

Why it’s risky: This approach is dangerous since it requires roasting the turkey at 190 to 200 degrees Fahrenheit for 12 to 13 hours overnight. A low oven temperature implies the turkey will take longer to heal, increasing the danger of unwanted bacteria growth and the possibility of toxins being generated that will not be removed by more cooking.
Don’t cook it at temperatures below 325 degrees Fahrenheit to keep your turkey safe.
How to brine Turkey?
Ingredients:
Vegetable and Fruit Scraps: I keep my vegetable and fruit scraps and wilted herbs in a large freezer-safe bag the freezer in the weeks leading up to brining a turkey. For flavoring your turkey brine, use carrot peels, onion peels, celery ends, garlic peels, orange peels, apple cores/peels, and rosemary and thyme stems. Simply put the herbs/peels into the freezer bag, and they’ll be ready to use for the turkey brine. If you don’t want to save your scraps, create the brining broth for the turkey with onions, garlic, apples, celery, and fresh herbs.
Brown Sugar: Brown sugar melts wonderfully in the brine to give the turkey a hint of sweetness.
Salt It’s crucial!
Peppercorns, fresh rosemary, fresh thyme, and dried bay leaves are all good spices because they complement the turkey’s natural characteristics.
You can use water, apple juice, chicken broth, turkey broth, or veggie broth for your turkey brine. I find the flavor difference insignificant, so I stick with water.
Before you start brining your turkey, bear in mind that it works best on a fresh bird, and the brine will not be entirely absorbed by a frozen turkey that has been injected with a saline solution. However, I have brined a frozen turkey previously, and it tastes just as good as not brining a turkey.
Equimpent requirements:
Pan for stock: To make the turkey brine, you’ll need a big pot. You won’t need an additional brining bag if your pan is large enough to contain the turkey and brine AND fit in your refrigerator.
An extra-large Ziploc Big Bag or Brining Bag: Some people brine their turkeys in brining bags, although they can be expensive and/or difficult to come by during the holidays. Others use a huge cooler and leave the turkey outside overnight in the brine to keep it cool. However, if you reside in the south, like me, it may be too hot for that bird to spend the night outside securely. Instead, I buy an extra-large zip lock bag to keep the turkey in the brine. It’s easy to find and cheap.
Directions:
Combine the salt, sugar, herbs, and vegetable and fruit scraps in a large stock pan.
Fill with filtered cold water or chicken or turkey stock.
To make the brine, bring it to a boil.
Reduce to low heat and continue to cook for 30 minutes, or until the sugar and salt have completely dissolved in the water.
Remove any particles from the brine liquid (if desired—or just discard with brining bag after removing the turkey from the brine.)
Remove from heat and set aside to cool for 30 minutes before refrigerating to finish cooling.
If you haven’t planned ahead of time and are brining your turkey right now, add 10 cups of ice cubes to the brine to cool it down quickly. You should never pour a heated brine solution over a chilled turkey since it will start to cook the bird and allow bacteria to proliferate.
What are the pro tips of brining Turkey?
When brining a turkey, keep in mind that a fresh turkey is ideal, and the brine will not be entirely absorbed by a frozen turkey that has been injected with a saline solution. However, I have brined a frozen turkey previously, and it tastes just as good as not brining a turkey.
I prefer to store the turkey and brining bag in my refrigerator’s empty produce drawer. Everything else in your fridge will be protected from raw turkey fluids if anything seeps from the brine.
I also recommend brining the turkey to the refrigerator (place turkey in brining bag and place in the produce drawer, then pour brine and remaining water over turkey and seal.) This is far more convenient than lugging the brine and turkey to the refrigerator.
Remove the brining bag from the drawer the morning of your turkey roasting (you may need 2 people to carry the drawer depending on how regularly you lift weights!!) and place it next to your sink. Ensure that everything is taken out of your sink and surrounding areas (so no turkey juice is splattered on something that is meant to be eaten)
Make sure to bleach everything surrounding the sink and do the dishes!! You don’t want to become sick from your food!
If you need to make your turkey brine on the day of brining, follow the brine directions. Place ten cups of ice in the brine to allow it to cool completely before adding the turkey.
Some food containers for brining
All glass, stainless steel, ceramic bowls, stainless-steel stock pots, brining bags, and plastic containers are appropriate. Larger food-grade containers are supplied in many restaurant supply stores, and they are frequently marketed to the general public. Examine the listings in your area.
As long as the sealable plastic bags are meant for food usage, they can be utilized. Garbage bags, laundry buckets, and other plastic containers that have not been graded for food use all contain chemicals.
Keep in mind that the food and brine should be kept in the refrigerator (below 40 degrees Fahrenheit or 4 degrees Celsius). Small, medium, or large insulated coolers can brine larger goods (such as turkeys) if you don’t have enough storage in your refrigerator. Just make sure the brine stays cold. To keep the brine cold, add sealed bags of ice to it and refill them during the brining process.
Conclusion
You’ll need a big bag. Fortunately, these are becoming more common, but huge oven-roasting sacks would suffice if you didn’t find them. Garbage bags are not a good option because they are not made for storing food, and the chemicals used may not be safe (I’m not sure, but let’s not do it).
It must be completely thawed and maintained below 40 degrees Fahrenheit to brine a turkey. I’ve always kept a second refrigerator on hand, but many folks rely on a huge cooler and plenty of ice if one isn’t available. The turkey should still be packed in a food-safe bag to prevent the brine from getting diluted. Let’s be careful out there since this is poultry.