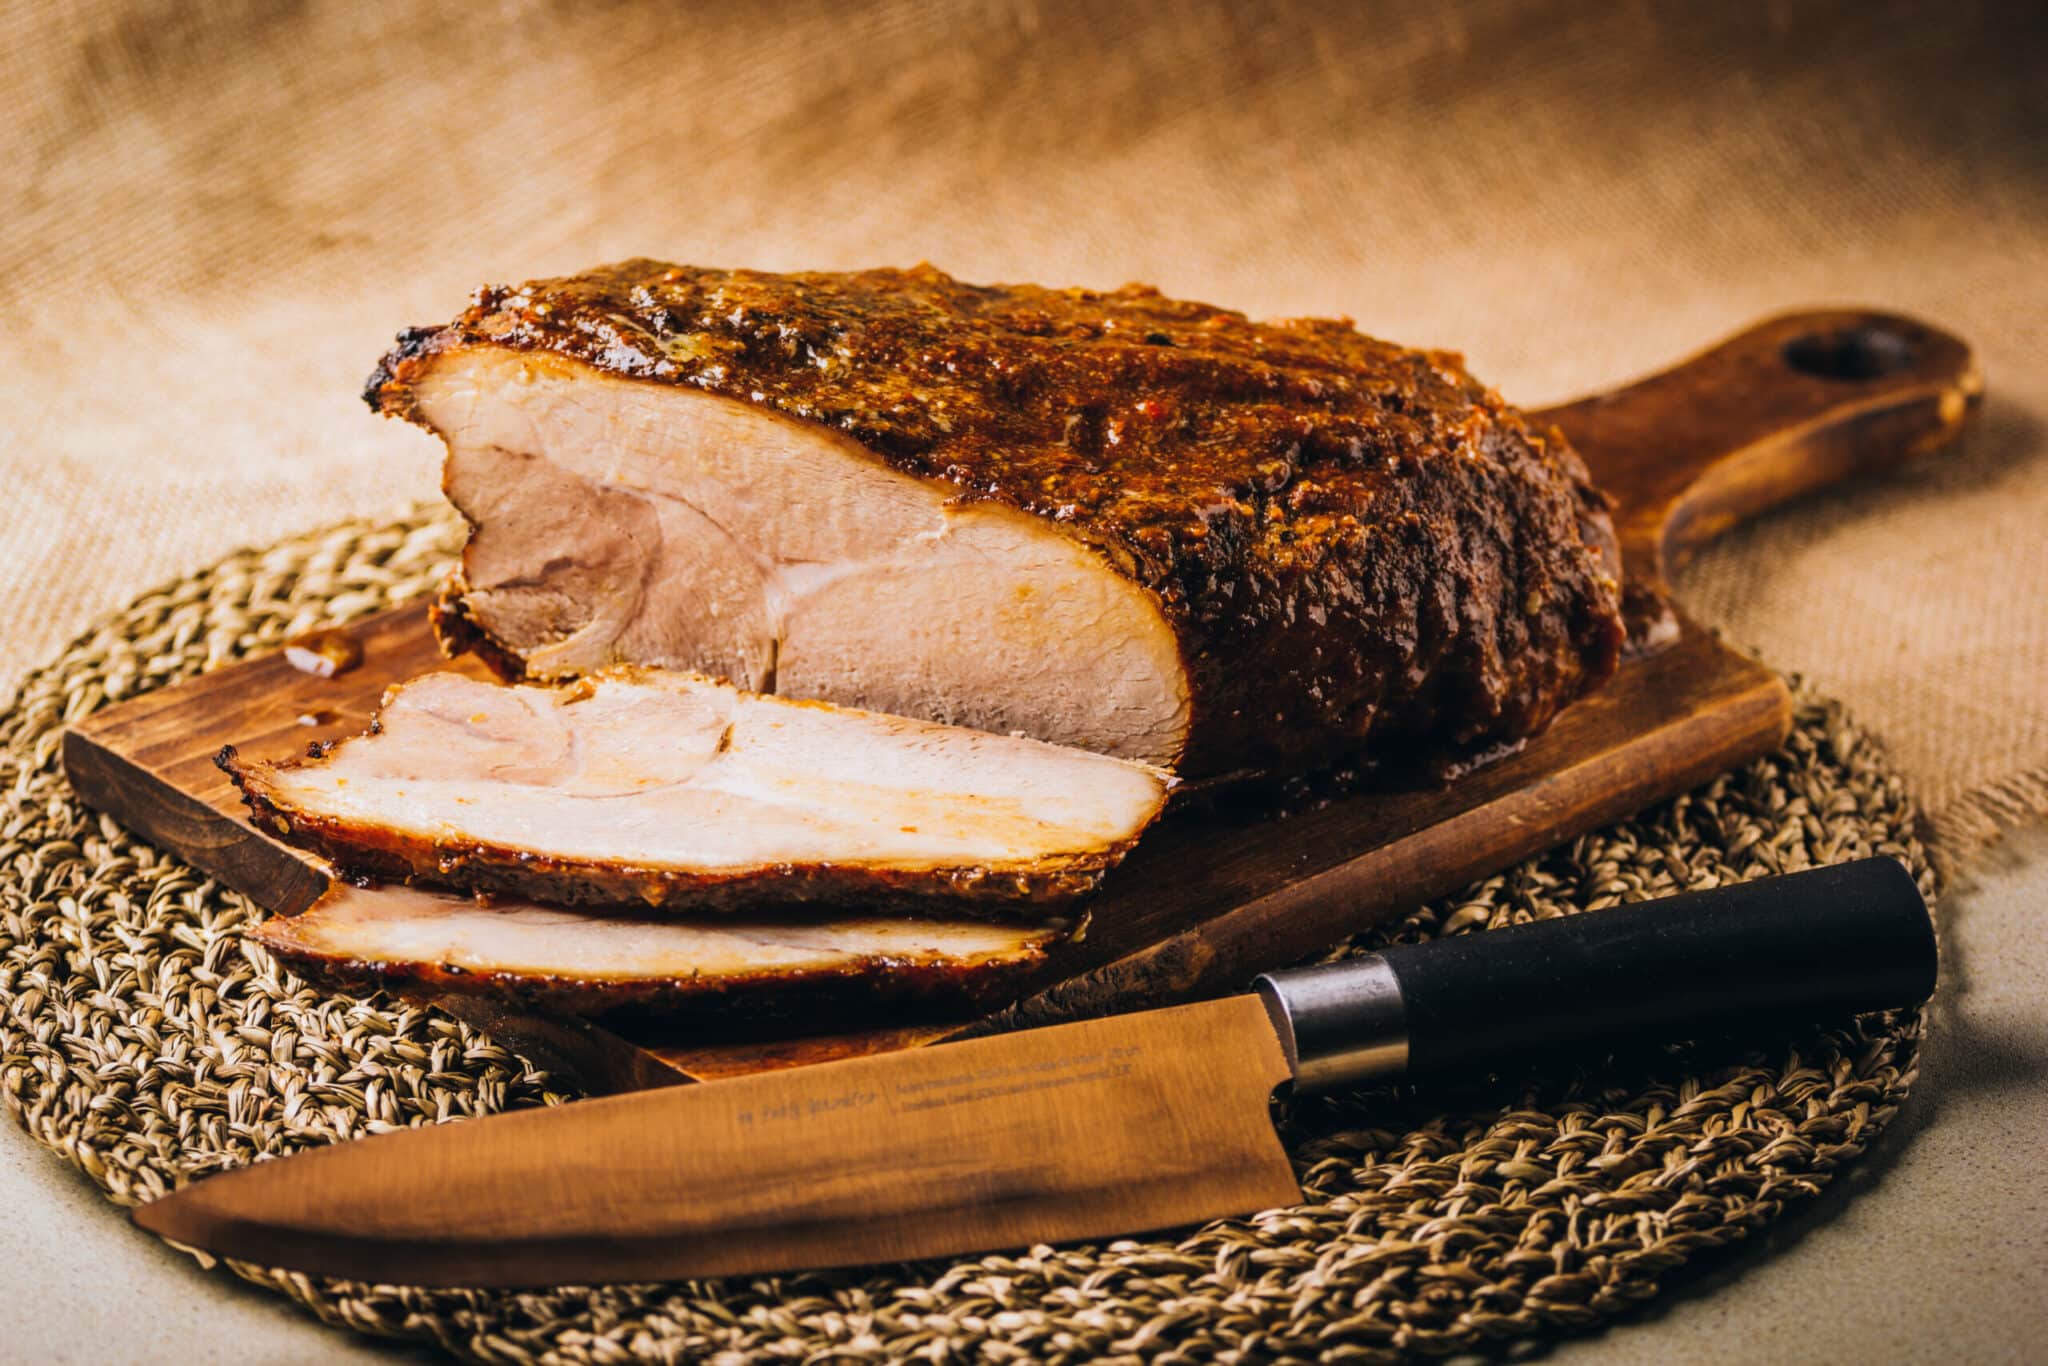
When you’re thinking of the perfect recipes for entertaining guests, pernil should rank among the top favorites. Besides the quality of taste you expect from pernil recipes, they’re perfect for serving small crowds, and provided that you cook it the right way, you can expect loads of satisfaction from the results of your cooking.
One of the reservations about cooking meat-based recipes for quite a number of people is how to calculate the correct cooking time to get the best results. If like many people, you’re not sure how much time to dedicate to cooking pernil per pound, then this article is for you. Simply pay attention to all our cooking instructions, helpful tips, and guidelines in order to get the best results with your pernil recipe.
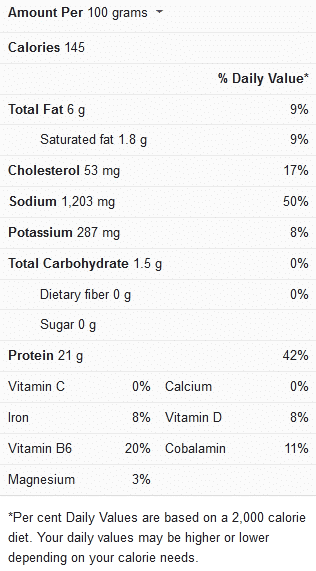
Pernil nutrition facts

Tips for cooking pernil per pound
Keep the following helpful tips, guidelines, and suggestions in mind when cooking pernil recipes:
To wash or not – Several recipes you might have come across will typically instruct you to wash your pork shoulder while cooking pernil recipes. People will understandably be inclined to believe this because washing is commonly linked with cleanliness.
However, it is not recommended to wash raw pork (or beef, poultry, lamb, or veal) before cooking. The bacteria will typically so firmly adhere to the raw meat being cooked that even hours of washing would not be enough to eliminate them. Also, any bacteria that you actually manage to get off the pork shoulder can cross-contaminate your counter, utensils, and other meals, putting your family’s health in danger.
Washing is typically not required in most meat-based recipes because bacteria are killed when meat is cooked to the proper temperature.
Recommended internal temperature – Remove the pork shoulder roast from the pan as soon as it reaches an ideal internal temperature of 180 to 185 degrees if you want to carve it into slices for an exquisite presentation. The meat should be soft enough at this point such that you can slice it readily but not so soft that it breaks apart under the knife.
On the other hand, leave the meat to cook until it reaches 195 degrees if you’re preparing pulled pork. The pork should be ready to be shredded after 30 to 45 minutes of resting.
Ideal cooking duration – When working with boneless pork cuts, you may wish to plan for a cooking time that is around 1 to 1½ hours per pound (this is assuming you’re cooking at a temperature of 225 degrees Fahrenheit). While the bone adds a lot of flavor to the meat, it can also prolong the cooking time for the roast.
Avoid opening the oven too frequently while cooking, since this may cause the cooking time to lengthen. Instead, make use of a meat probe to monitor the temperature of the meat while keeping the oven’s temperature above 220 degrees.
Cooking time for pernil per pound
Take note of the timing guidelines in the table below when cooking pernil recipes:
| Cooking procedure (per pound) | Cooking time |
| Cooking a 6-pound pernil in the oven at 225 degrees Fahrenheit | 9 to 12 hours |
| Cooking a 8-pound pernil in the oven at 225 degrees Fahrenheit | 12 to 16 hours |
| Cooking a 10-pound pernil in the oven at 225 degrees Fahrenheit | 12 to 18 hours |
| Cooking a 10-pound pernil in the oven at 225 degrees Fahrenheit | 14 to 24 hours |

Fall-apart roasted pernil with Rosemary, mustard and garlic (12 servings)
Ingredients
- 2 tablespoons of chopped garlic
- 3 anchovies, rinsed
- 2 tablespoons of chopped fresh rosemary
- 2 teaspoons of kosher salt
- 1 teaspoon of freshly ground pepper
- ¼ cup of olive oil
- 2 tablespoons of coarse Dijon mustard
- 1 6-pound boneless pork shoulder trimmed of excess fat and tied
Instructions
- Combine the anchovies, garlic, rosemary, salt, and pepper in a small food processor. Scrape down the sides of the food processor as you pour in the olive oil, afterwards, process the mixture until a paste is formed.
- Remove the blade of the processor, then whisk in the mustard using a fork or spoon.
- Refrigerate for 2 to 24 hours after rubbing the processed paste over all the surfaces of the pork shoulder; ensure that it is covered loosely with plastic wrap during this period.
- Adjust your oven’s temperature to 450 degrees Fahrenheit and leave it to preheat. In the meantime, let the pork get to room temperature as the oven heats up.
- Put the pork shoulder in a small roasting pan and let it roast for 30 minutes, uncovered until the top begins to brown.
- Reduce the heat to 250°F and continue cooking the pork shoulder for 6 to 8 hours (it should be left uncovered during this period), or until the roast’s center registers 180°F when checked with an internal thermometer. At this point, you should be able to feel that the meat has developed an extremely soft quality throughout as you push the thermometer in.
- If there are any fluids left in the pan, pour them into a heat-safe container, such as a Pyrex measuring cup. While the roast is resting, place the Pyrex cup containing the juices into the refrigerator, so that the fat can rise to the surface of the liquid.
- When the meat is done, if you believe the exterior part of the roast will benefit from a little more crust/brownness, increase the heat back to the initial temperature of 450°F, then leave it to cook for an extra 15 to 20 minutes to give the outer part of the roast a bit more crunch.
- Take the pernil out of the oven and set it aside for 20 minutes. Pour the cooking liquids into a serving pitcher or bowl after removing the fat from the conserved juices in the fridge (feel free to let the juices warm a bit in a small pot or in the microwave if you prefer).
- Cut up the pernil as thinly or as thickly as you desire, keeping in mind that the meat will at least partly break apart. Before serving, season the sliced meat with salt and leave the reserved juices from the pan on the side to drizzle over the pernil.
Recipes for pernil usually yield such mouthwatering results, especially because the pork has an amazing-tasting quality. Choosing to follow the most appropriate cooking instructions will also serve to further increase the appeal of the end results of your cooking, so ensure that you’re doing the right thing.
For more recipe ideas and inspiration on how to get the best out of pernil recipes, we recommend that you check out this video recipe.
