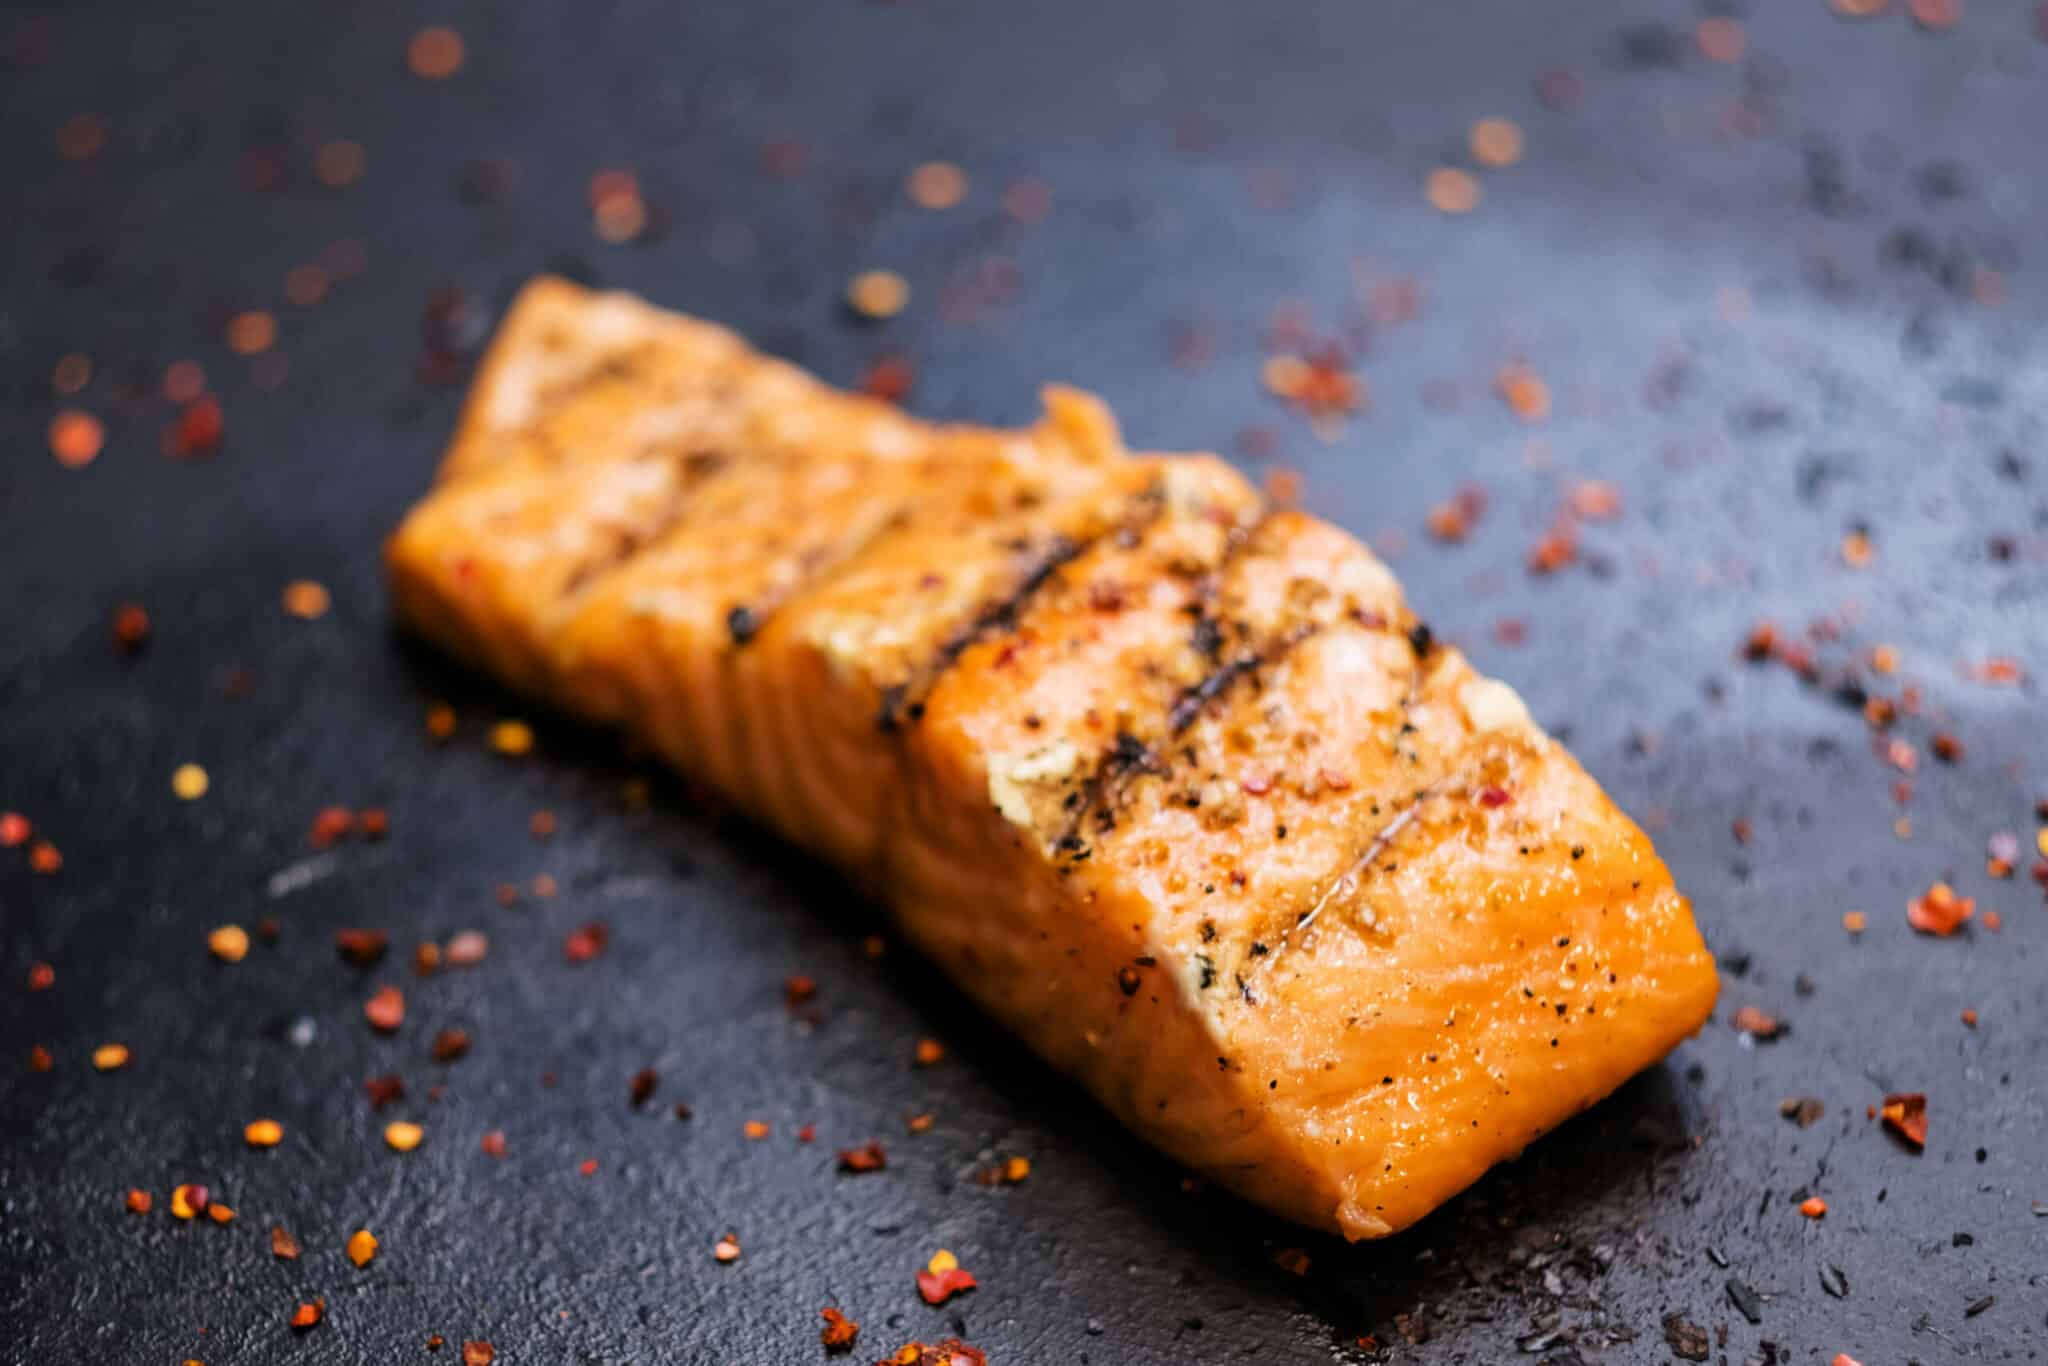
Oven roasting is another great and convenient way of making this delicious salmon recipe; most people might think of the grill with this recipe because of the rich, smoky, and mouth-watering flavor that comes with grilled fish, but if you don’t own a grill or the weather isn’t suitable for outdoor cooking, or maybe you don’t want to go through the stress of going outside, cleaning and setting up the grill. This recipe method is perfect for you.
You don’t need to worry about getting the flavors you’d normally get from a grilled salmon in the oven–baked salmon because that’s what the cedar plank would help you with; it adds that sweet, smoky, and delicious cedar flavor into the fish without having to use a grill. If this is your first time making this recipe, there is no need to fret. Just sit back and enjoy the read because we will be covering everything you’ll need to know about making this recipe in an oven.

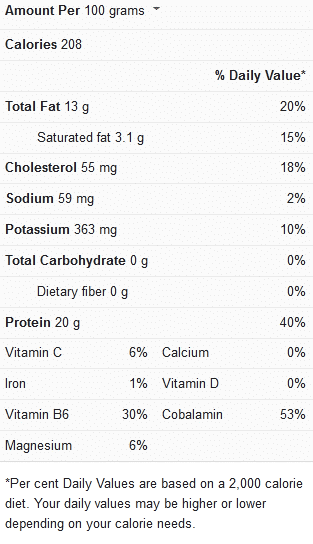
Salmon Nutrition Facts
Tips to note when making a cedar plank salmon in an oven
This recipe is incredibly easy and delicious, which is why you’d be able to make it once you learn the steps, but when you apply these tips below in your cooking process, then you’ll make a perfect dish each time.
Soak the planks early before you start cooking; soaking the planks in the water ahead of time allows the smoky cedar flavor to easily come out when you start cooking and prevents it from burning; try to soak them weeks ahead and store them in a freezer until they are needed. If you don’t have much time, also you could quickly soak the planks in water for 45 minutes to an hour.
When you’re done with the recipe, you can preserve and clean the plank by rinsing it with hot water and scraping any food bits out of it; avoid using soap to clean it, so it doesn’t get stuck on the plank and alter the flavors next time you cook.
Use an instant-read thermometer; the recommended minimum safe internal heat temperature for salmon is 125°F, so if you are looking for accurate measurement for doneness, use an instant-read thermometer. Working with the cooking time may work, but since ovens vary in different kitchens, it is safer to use a thermometer; if you don’t have one, check if the salmon is flaky on the outside and if the color of the fish changes from red to light opaque pink if it does then it is ready.
Use butter to coat the salmon; after seasoning the salmon, you can coat it with cooking oil or butter (garlic butter for extra depth of flavor) just before you bake; this allows it to cook well without sticking to the plank and also adds a rich flavor and a crispy texture to the salmon.
Use a salmon rub or make one; there are tons of salmon rubs available in stores; you could purchase one and apply it generously on the salmon before you bake, or you can make yours with just a few ingredients and in a short time.
To make a salmon rub bring a bowl and add 1 teaspoon of salt, 1 tablespoon of brown sugar, 2 teaspoons of ancho chili powder, 1 teaspoon of ground cumin, and 1/2 teaspoon of ground black pepper. Mix them and apply them to the salmon before cooking.
Make a glaze for extra flavor; this tip is optional, so you could choose not to do it but applying a glaze to the salmon does help with an extra depth of flavor, especially since the cedar plank is involved; you can make a glaze by mixing brown sugar and Dijon mustard until it becomes smooth.
Line the baking sheet for easy cleanup; you can line the baking sheet with aluminum foil first before baking so the cleanup would be easy after cooking.
Use a marinade; combine 2 tablespoons of salt with 2 cups of water and brine the salmon for about 10 minutes; this would help reduce the amount of white protein that appears on the surface of the cooked salmon.
Let the salmon rest after cooking; a few minutes to the complete cooking time, remove the salmon and let it rest first on the cedar plank because it would continue to cook once it’s out of the oven.
View this post on Instagram
Cooking Time for Cedar Plank Salmon in the Oven
The table below shows the estimated cooking time to follow when making a cedar plank salmon in an oven.
| Cooking method | Cooking time |
| Baking a cedar plank salmon in an oven | 15-20 minutes |

Cedar plank salmon ( 2 servings)
Ingredients
- 1 pound salmon fillets
- 1 teaspoon paprika
- 2 tablespoons sesame oil
- 1 teaspoon basil
- 3 tablespoons brown sugar
- 1 teaspoon dried dill weed
- 1 tablespoon sesame seeds
- 1 teaspoon freshly ground black pepper (Optional)
- 1 lemon, cut into wedges (Optional)
Instructions
- Soak the cedar plank(s) in water for an hour and Preheat the oven to 425°F.
- If the salmon is frozen thaw it in the refrigerator overnight and let it come to room temperature before cooking.
- Use a salmon rub or make yours by mixing 1 teaspoon paprika, 1 teaspoon basil, 1 teaspoon salt, 3 tablespoons brown sugar, 1 teaspoon dried dill weed, 1 tablespoon sesame seeds, and 1 teaspoon freshly ground black pepper inside a small bowl.
- Pat the salmon dry, remove the cedar planks and place the salmon on the planks.
- Apply cooking oil on it or melted butter then add the mixed spices on it and place some lemon slices on it (you could use any citrus fruit of your choice).
- Bring a baking sheet and cover with aluminum foil, place the cedar plank on it and place it inside the preheated oven.
- Cook for about 15-20 minutes depending on the desired doneness and check with a fork to see if it flakes easily.
- You could add a glaze last minute before taking it out of the oven and serving it with some fresh vegetables.
For more ideas and inspirations on this recipe, check out this video recipe