Any St. Patrick’s day dinner that doesn’t include corned beef is considered incomplete. Dinner menus typically include it during this period, and directions for homemade variations can be found everywhere.
This is because corned beef recipes have evolved into a delectable way to honor aspects of the Irish-American experience. You’ll also find that cooking corned beef at home can be a gratifying culinary adventure, especially with the right instructions.
Here, you’ll learn how to cook corned beef to obtain tender and delicious results. Also, watch out for our tips and guidelines to ensure the best-tasting results.
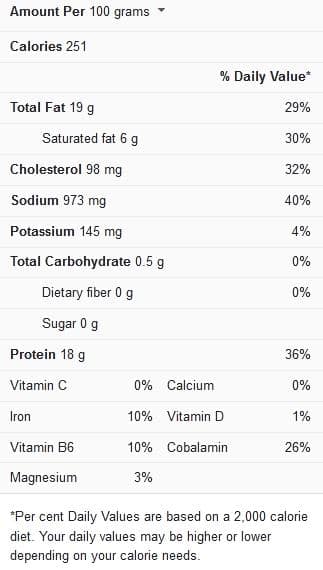
Corned beef nutrition facts
Tips for cooking tender corned beef
Take note of the following helpful tips when cooking tender corned beef; they will ensure that you get great results:
Always rinse your meat – You may be in for a salty dish if you try to cook your meat straight out of the plastic wrappings or from the salt solution used for storage in the fridge.
What you should do instead is to rinse the meat severally under lukewarm running water. This will help to eliminate any extra salt content in your meat, whether you bought them in a ready-to-cook form or you salted your own. There’s no need to worry about rinsing all the flavor off the meat; the meat should be well imbued with it at this point.
Fill the pot with enough water – One tried and true method that is sure to produce extremely tender results with corned beef recipes, especially when done correctly, is boiling corned beef on the stovetop. The volume of water in the pot during this cooking process is one of the secrets to achieving the degree of tenderness you crave. When there isn’t enough water to cover the beef at any point during the cooking, your delicate corned beef craving may end up unsatisfied, leaving you with a harsh, chewy outcome.
You should begin the cooking process by filling up a stockpot with as much water as is necessary to submerge the beef completely. During cooking, open the lid so that you can check the amount of liquid and, if necessary, add more water. This minor procedure will aid in the production of super-tender corned beef.
Don’t cook your brisket over high temperatures – Briskets are not the kind of meat to cook over high heat. Corned beef that has been cooked at a high temperature for an extended period will become rough and brittle, and the texture you need is supple and tender.
Instead of cooking your brisket over high temperature, it’s ideal for cooking it over low heat, irrespective of the cooking method you choose to employ. Cooking corned beef slices at a low, moderate boil on top of the stove or in the slow cooker ensures soft, tender slices every time.
Allow an adequate cooking time – Brisket is a naturally tough piece of meat commonly used for corned beef. Due to its tough nature, cooking is typically a time-consuming process. Even after the meat has been cooked completely, it will still require some extra time to convert chewy bites into a pleasantly tender mouthful.
As a result of these observations, it is important to keep in mind that corned beef requires patience during cooking to develop into the delicate result you expect. It’s a tough piece of meat that takes a long time to cook. For three pounds of corned beef cooked on the stovetop, allow at least three hours, or between eight and ten hours for three to four pounds of corned beef brisket cooked on low settings in the slow cooker.
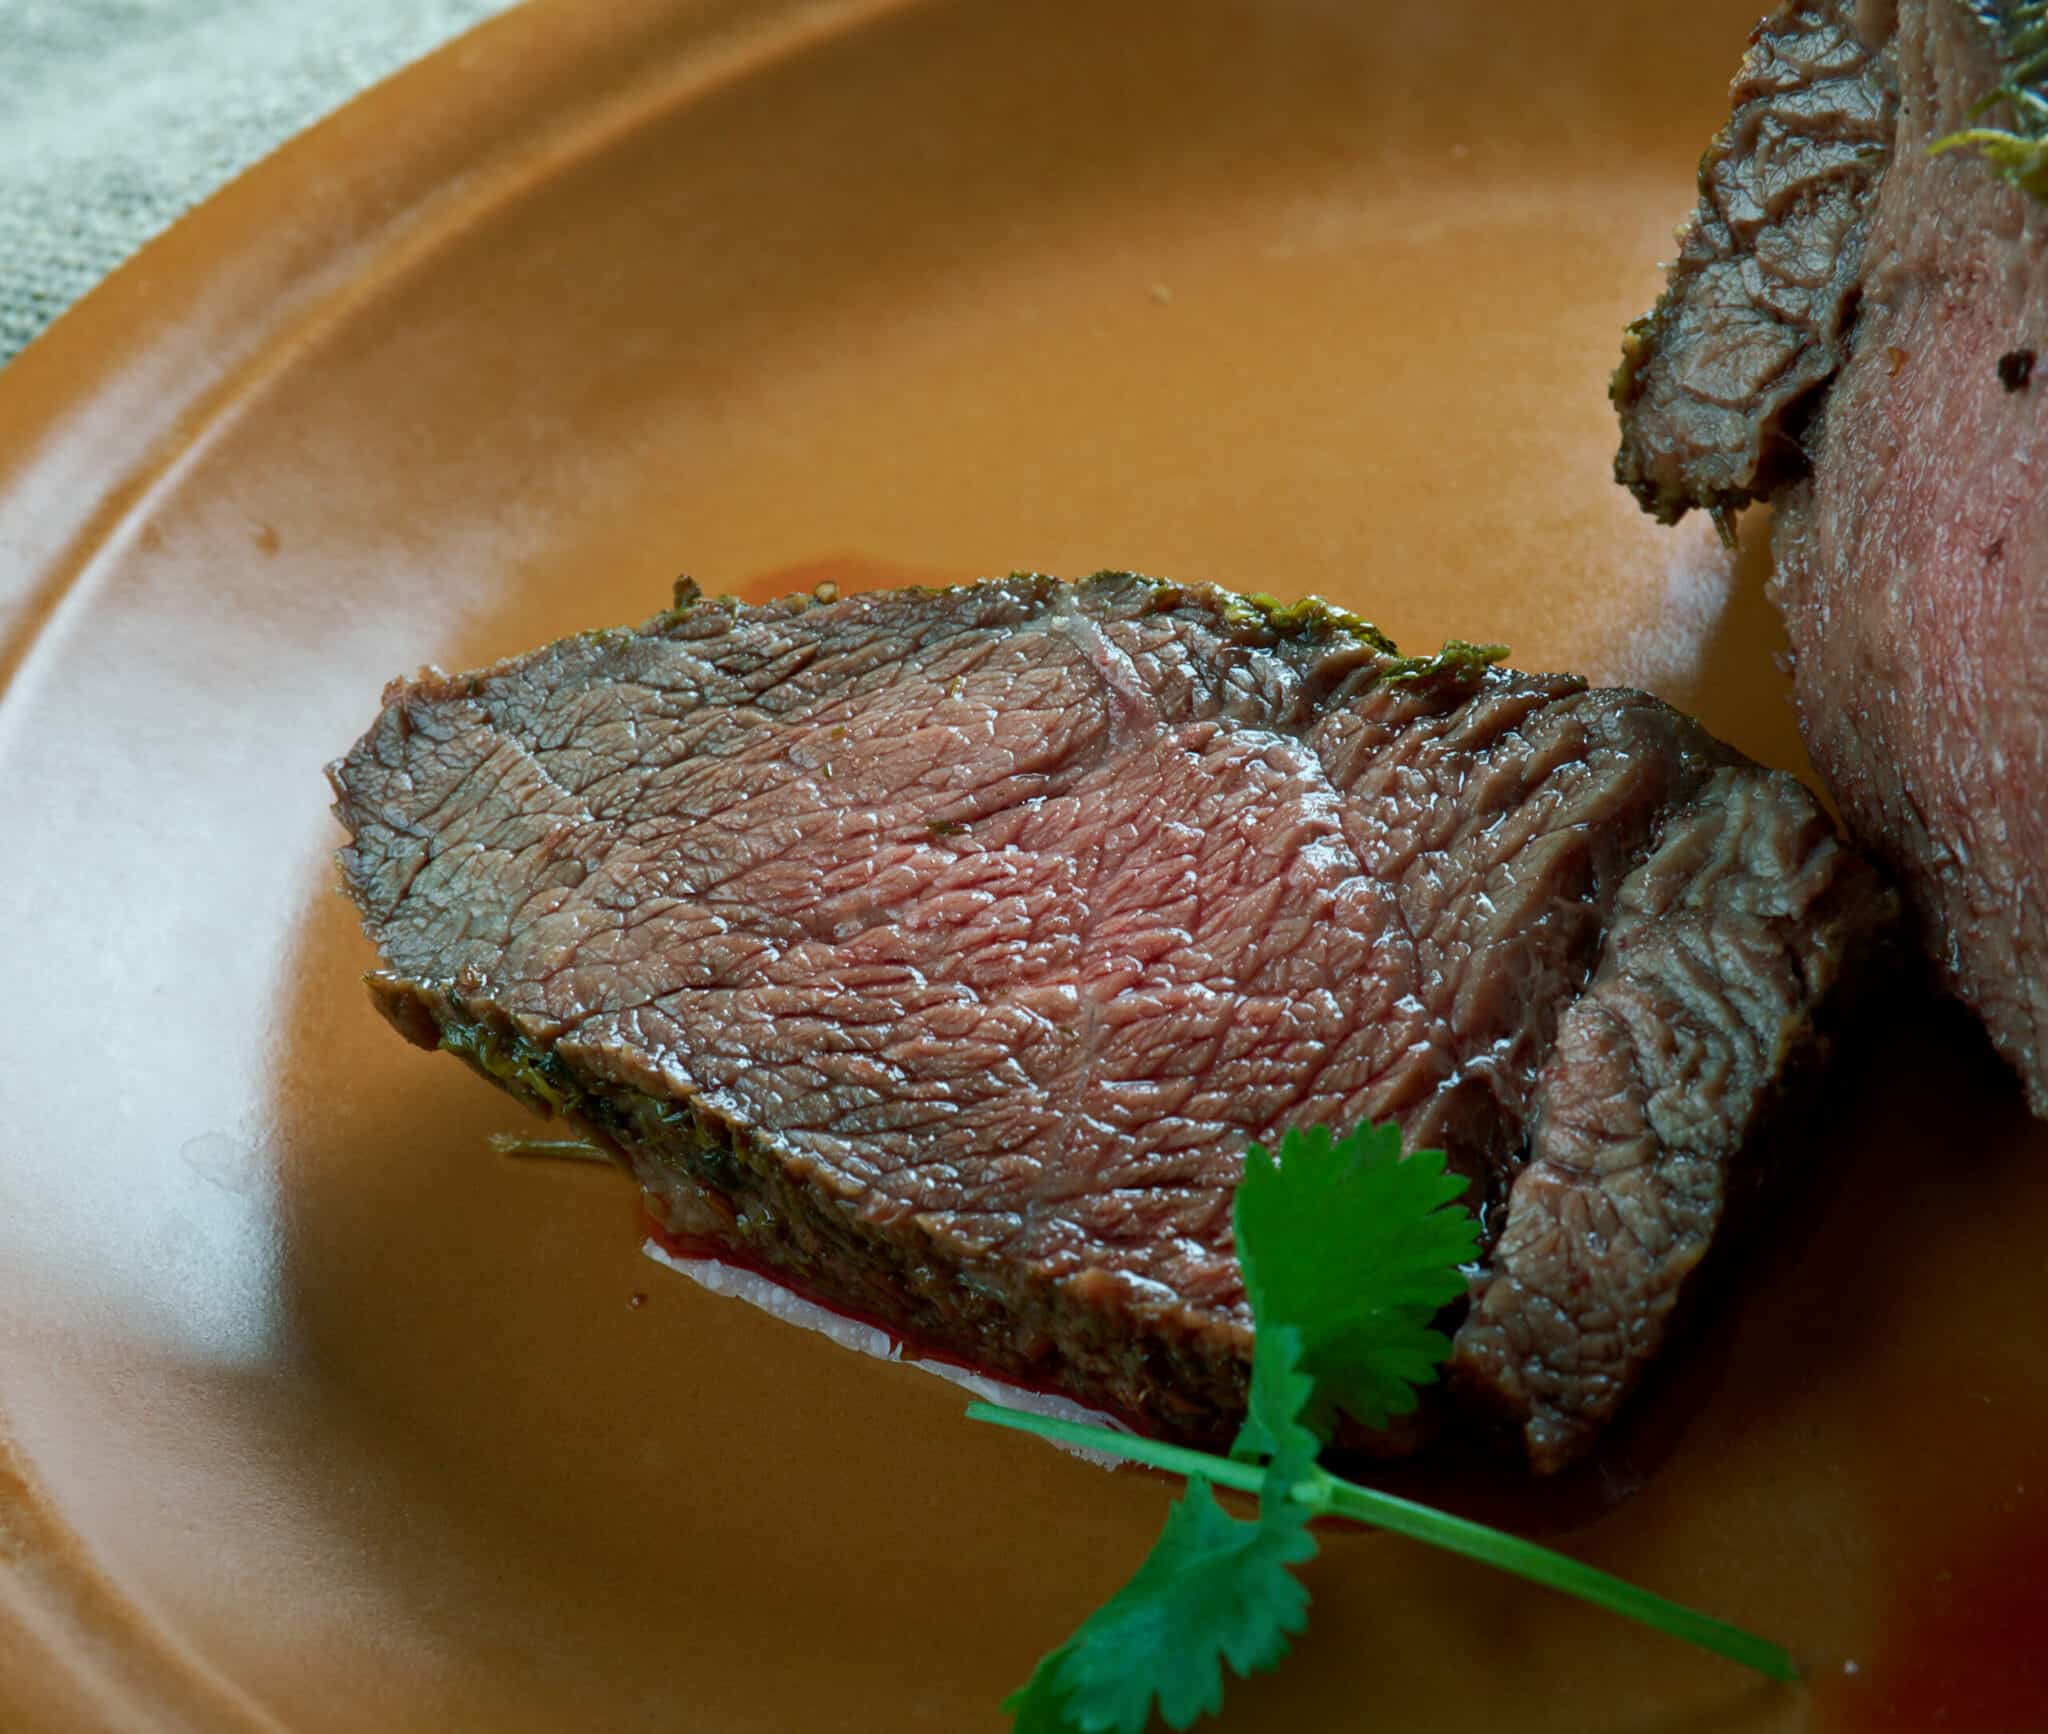
Cut your meat against the grain – It makes a great difference in how you slice your corned beef after cooking it. It’s very important to avoid slicing your meat with the grain (this means cutting in a similar direction as the muscle fibers in the cooked meat) as this tends to result in a chewier product.
Instead, you should treat your corned beef like you would handle a steak. The “grain” of the flesh can be identified by lines of apparent muscle fibers on the surface. Corned beef should always be sliced against the meat grain (instead of with it). When the muscle fibers are cut through, they shorten them, making it easier to chew each piece.
View this post on Instagram
Cooking Time for Tender Corned Beef
The timing guidelines that guarantee premium results with corned beef recipes have been described simply in the table below:
Cooking procedure
Cooking time
Simmering corned beef on the stovetop
3 hours (for a 3-pound cut of meat)
Cooking corned beef in the slow cooker
8 to 10 hours (for a 3 to 4-pound cut of meat)
Cooking corned beef in the oven at 325 F
3 hours
Print
Corned beef brisket (8 servings)
Ingredients
- 3 lb of corned beef brisket
- ½ teaspoon of whole allspice berries
- ½ teaspoon of coriander seeds
- ½ teaspoon of whole cloves
- ¼ cup of brown sugar
- Two teaspoons of freshly ground black pepper
Instructions
- Preheat the oven to 325 degrees Fahrenheit. Rinse the meat under cold water to remove any extra fat. Place the fatty side facing upwards in a large roasting pan with a roasting rack, then pat the meat dry.
- Mix and crush allspice, cloves, and coriander in a medium-sized mixing bowl; do this with the end of a wooden spoon or in a mortar using the pestle to crush the spices into somewhat smaller bits. (It’s fine to leave some in their whole form) Mix black pepper, brown sugar, and crushed spices in a medium mixing bowl. Using your hands, evenly distribute the spice mixture over the top of the brisket. Cover the brisket with aluminum foil and 6 cups of water in the roasting pan. Roast the brisket for 2 hours, then take off the foil and continue to roast for another hour or until the meat is cooked.
- Leave the cooked brisket to stand for about 15 minutes before slicing into it and serving as you please.
If you’d like more ideas on how to cook tender corned beef, check out this video recipe.