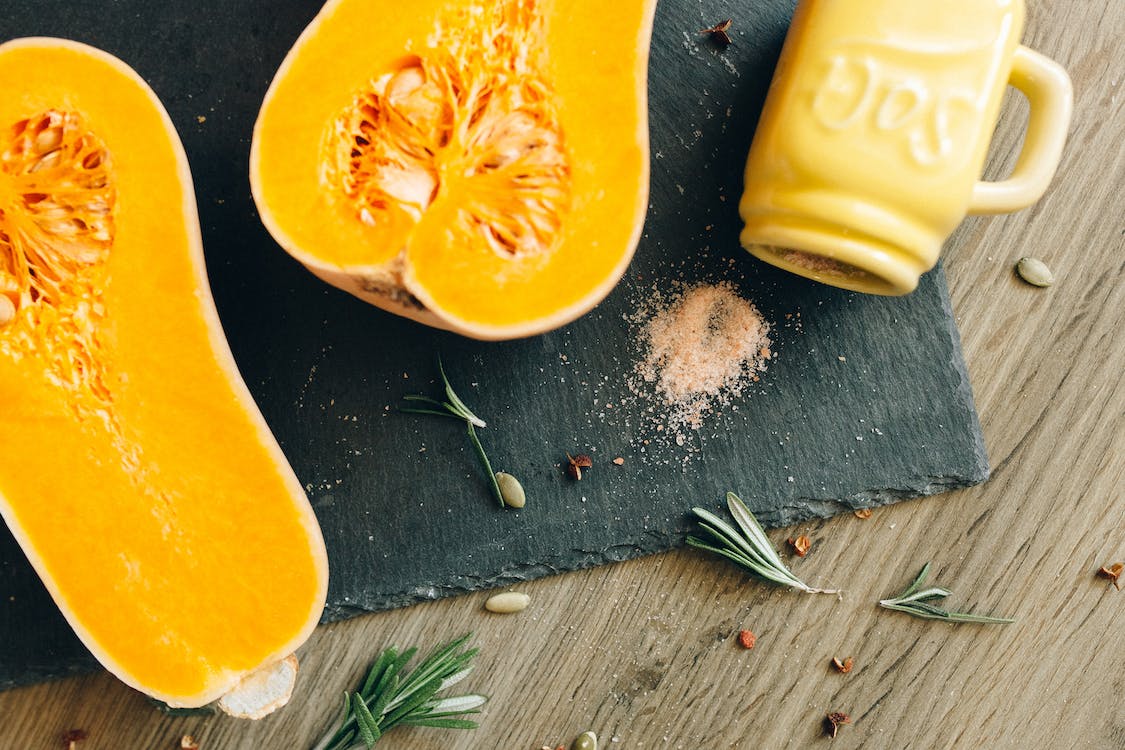
Yellow squash is one of those side dish recipes that are extremely rewarding to make, it’s yellow bright color somehow makes the cooking process seem very cheerful and the results delicious but this isn’t far from the truth because the recipe is.
The fact that yellow squash is something that can be found in abundance during its season makes this recipe tempting to try plus it’s easy to make, once you slice it up, season, and bake, the squash would taste delicious and have just the right buttery-crunchy texture in your mouth, did I also mention how healthy this recipe is- It’s vegan, vegetarian, gluten-free, low in carbs, paleo, and keto. So everyone can get a taste of this appetizing perfection.
With just a few ingredients and little time you can be able to make this recipe for yourself, which is why and this article, we would be showing you how to, but before we get into the cooking process let’s look at some useful tips to apply when making yellow squash.
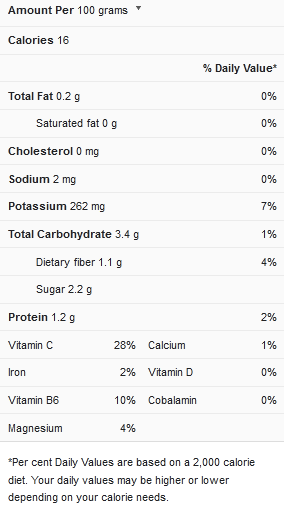
Yellow squash nutrition facts

Tips to consider when making yellow squash
Yellow squash is easy to make and you can be ahead of the game when you apply these little helpful tips to your cooking.
Use small and medium-size yellow squash for this recipe; you would be able to get the small and medium sizes easily in stores but you might get the big sizes if you grow yellow squash in your garden.
The bigger ones are not ideal for this recipe because they have thicker skins, larger seeds, and a different taste and texture from the smaller ones, instead use these big ones for baking. Remove the seeds, grate the big yellow squash and use it in a bread recipe or a muffin recipe.
You don’t have to peel the skin; you can bake the yellow squash with the skin on, the skin is thin enough to go unnoticed plus it’s edible, has a nice chewy texture, and is also flavorful. This would also save time for you when making this recipe.
Drizzle the sliced squash with olive oil; doing this before you start baking would not only keep the squash from sticking to the pan but would also keep the spices on the squash.
Pay attention to the slices to avoid a mushy squash; to get a tender but the crispy texture on your squash cut the squash into thicker slices about ½ inch. When they are in the oven they would get tender but still retain their structure, another way to avoid a mushy squash is to pay close attention to the squash so it doesn’t overcook.
Make a light breading for a crispy texture; combine bread crumbs, and freshly grated parmesan cheese with some seasoning like paprika, dried oregano, salt, garlic powder, or some Italian seasoning, and rub on the sliced squash before baking.
Broil the squash for four minutes; this tip is optional but it adds to the flavor and appearance of the roasted squash. After baking all you’d have to do is to switch the oven to broil for 4 minutes.
Top the squash with some chopped nuts; this tip is also optional, you could do this if you want an extra crunch when you eat the squash. Just sprinkle some toasted almonds, walnuts, or pecans before you serve.
Feel free to add other vegetables to this recipe; you can switch things up by adding other veggies to the squash recipe, this would create an interesting variety and a delicious meal.
Make sure the veggies you’d be using have similar cooking times as the yellow squash so they come out at the same time, veggies like zucchini, asparagus, and bell peppers would work for this recipe.
Garnish the roasted squash with fresh herbs and spices; you could either use any of these herbs or spices to garnish this recipe, ingredients like thyme, basil, chopped parsley, oregano, Italian seasoning, onion powder, garlic powder, etc to flavor this recipe.
Roasted squash leftovers could be stored; place the squash in an airtight container and put in a refrigerator for up to 2-3 days.
View this post on Instagram
Cooking Time for a Yellow Squash in an Oven
The table below contains the cooking time to use when making a yellow squash in an oven.
| Cooking method | Cooking time |
| Roasting a yellow squash in an oven at 425 degrees | 20 minutes |

Oven-baked yellow squash ( 4 servings)
Ingredients
- 4- 5 yellow squash (medium-small size)
- 2 tablespoon olive oil
- ⅓ cup of grated parmesan cheese
- 1 teaspoon garlic powder
- 1 teaspoon onion powder
- 1 teaspoon freshly ground black pepper
- 1 teaspoon oregano
- 1 teaspoon basil
- 1 teaspoon kosher salt
- Half a cup of breadcrumbs
- 1 ½ teaspoon paprika
Instructions
- Start by pre-heating the oven to 425 degrees F.
- Next, take the yellow squash and start slicing them into a round ½ inch thickness.
- After that take a bowl and mix the dry spices, add 1 teaspoon garlic powder, 1 teaspoon onion powder, 1 teaspoon freshly ground black pepper, 1 teaspoon oregano, 1 teaspoon basil, 1 teaspoon kosher salt, 1 ½ teaspoon paprika, and half a cup breadcrumbs.
- Next, take the olive oil and evenly rub on the sliced yellow squash, an easier way of doing it is adding 2 tablespoons of water and olive oil in a plastic bag and adding the yellow squash slices in it, this would allow you to mix them properly without making a mess.
- Now use the dry spices you’ve mixed and apply them to the oiled yellow squash slices.
- Next, take a baking sheet and line then with parchment paper or use a cooking spray, place the squash slices evenly spaced on it and bake for about 7-8 minutes.
- Remove the baking sheet, take the grated parmesan cheese and sprinkle on the squash slices evenly.
- Pop the baking dish back into the oven and bake for another 10-12 minutes until the cheese is properly melted and the squash is tender enough.
- Taste to see if there is any need for an extra sprinkle of salt or pepper, if there isn’t sprinkle some chopped parsley or basil and serve.
If you’d like more recipe inspirations for roasting a yellow squash in an oven, check out this video recipe
